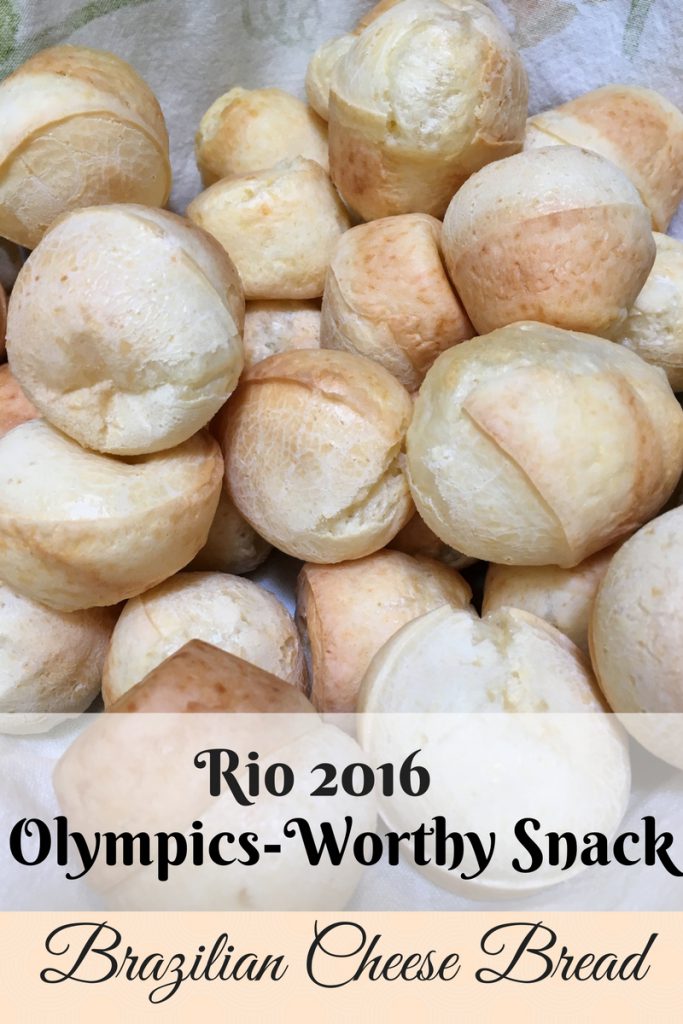
An Olympics-Worthy Snack for Rio 2016

Olympics-worthy snack


The Rio 2016 Olympics start tonight, so we all need an Olympics-worthy snack to enjoy as the games begin! I grew up watching the Olympics, and I still look forward to the games every two years. From the pomp and pageantry of the opening ceremonies to the proud moments watching our athletes stand on the medal podium, I find myself riveted to the TV. So, of course, all this TV watching requires a good snack. (Click the link for the the full Rio 2016 Olympics viewing schedule.)


Why is Brazilian Cheese Bread Olympics-Worthy?


In honor of the Olympics being in Rio de Janiero (and because I’m using a new recipe plugin now), I thought it was worth re-visiting my Brazilian Cheese Bread recipe. After all, the Olympics are in Brazil, and at least in my world, you can’t have too much Brazilian Cheese Bread!

The best part about Brazilian Cheese Bread – or cheesy bread as the kids call it – is that it’s actually healthy and easy to make. All the ingredients get thrown together in the blender, whirred around until you have a smooth batter, then poured into mini muffin tins. That means you only have one appliance to clean – awesome!

Brazilian Cheese bread in muffin tin

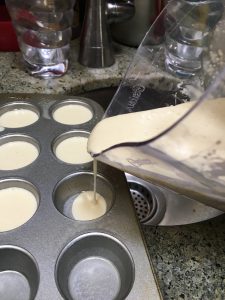
Pour the batter into well-greased mini muffin tins

These little bites are also gluten free since they use tapioca flour rather than regular wheat-based flour. This makes them light and fluffy as well. You pick the cheese depending on what flavor you like. The kids love cheddar, so that’s what I usually stick to, but I’ve made them with gruyere, mozzarella & parmesan, and a Mexican cheese blend. They’re all fantastic.

The bread comes out a cute little puff that’s a little crispy on the outside with a rich, chewy center. The texture is both light and satisfying, cheesy and bread-y (is that a word? It is now!). They’re the perfect Olympics-worthy snack food, especially for some serious Olympics watching. Just be careful, because it’s super easy to eat one after another after another until they’re gone. Oh, what the heck, go ahead – there’s nothing bad in them, so eat to your heart’s content! I bet even some of the Rio 2016 athletes would include these little morsels on their menus.


Okay, What’s In It?


Cheese, olive oil, milk, egg, a little salt and tapioca flour. If you don’t have tapioca flour – also known as tapioca starch – in your pantry, no worries. It’s easy to find. Most grocery stores will have it in the same aisle with the regular flour. Just look for it with the other packages of “specialty” items like oat bran, almond flour, rice flour and the like. Bob’s Red Mill is a popular brand that most grocery chains carry now.


Brazilian Cheese bread ingredients

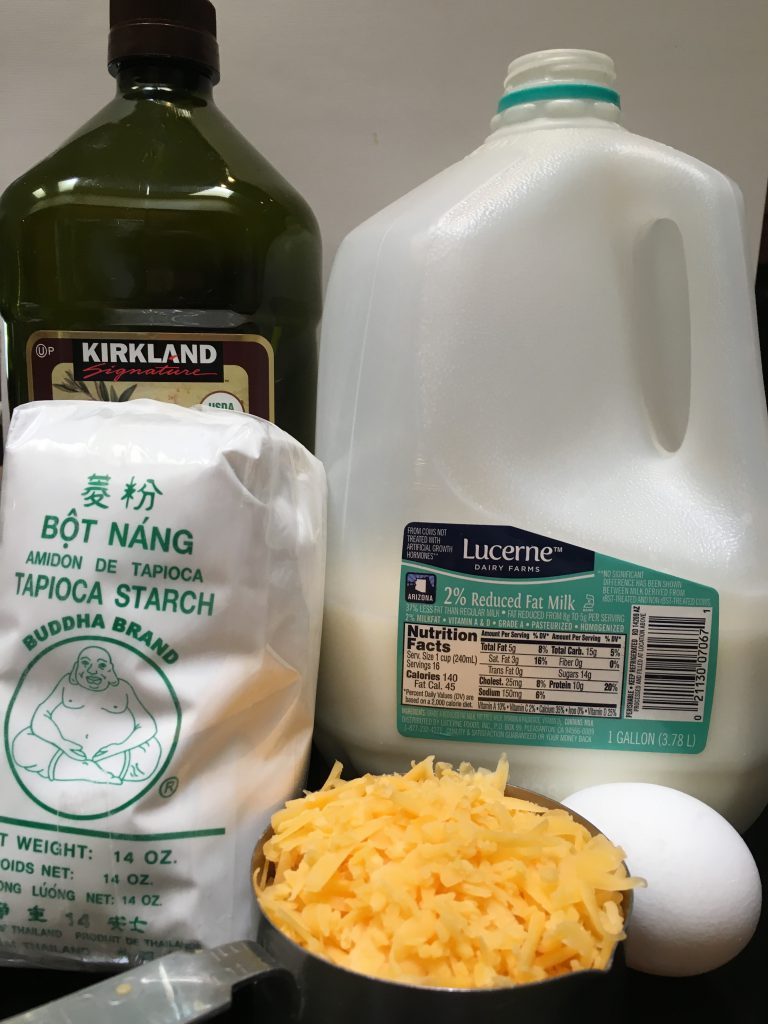
Tapioca Flour (starch) from the Chinese store along with the other ingredients


If you happen to have an Asian market nearby, go there for your tapioca flour. I usually buy several packages on my runs to the Chinese grocery store since I can score each package for around 89 cents.

If you’re dairy-free, I’m afraid I haven’t tried any substitutions with this recipe. This is one I follow to the letter with no alterations. Not because I don’t like to experiment, but because this recipe works. It’s just right. Every time. If you do try any substitutes, let me know. I’d love to hear how they work!


Are You Ready to Try These?

Okay, I won’t keep you waiting any longer. Here’s the recipe!


Print Recipe
Brazilian Cheese Bread for Rio 2016
A light, chewy, cheesy puff perfect for snacking. Gluten-free and delicious. Add these to your Rio 2016 Olympics watching menu or serve them anytime!
Olympics-worthy Brazilian Cheese Bread
Prep Time 10 minutes
Cook Time 20 minutes
Servings
mini puffs
Ingredients
Prep Time 10 minutes
Cook Time 20 minutes
Servings
mini puffs
Ingredients
Olympics-worthy Brazilian Cheese Bread
Instructions
  1. Preheat oven to 400 degrees F.
  2. Grease or spray mini muffin tin(s) - 1 large or 2 small.
  3. Put all ingredients into blender & blend until smooth, scraping down sides as necessary.
  4. Pour batter into muffin pans so each cup is nearly full.
  5. Bake 15-20 minutes or until puffed and lightly golden brown.
  6. Let cool in pans for a few minutes, then remove and serve.
  7. Enjoy!
Share this Recipe
Read More

Chicken Enchiladas (Plus Bonus Vegetarian Version)

Chicken Enchiladas

Chicken Enchiladas with beans and guacamole


On busy weeknights I need go-to recipes I can prepare in a flash. And in my household I also need the recipe to be flexible enough to accommodate our vegetarian teen as well.

These chicken enchiladas make a satisfying and comforting meal. A few weeks ago, my friend had a death in the family and was so busy taking care of family business, she didn’t have time to cook. I took her a pan of chicken enchiladas, along with some Mexican rice and beans to complete the meal. She texted me later to ask for the recipe, so I think they enjoyed it!

Given her request for the recipe and the fact that I made these last night, I thought it was time to put the recipe out there. For once, it’s a recipe of my own creation and not something I found on the internet. I’ve taken bits and pieces of other recipes and come up with something that works really well for my family. And with just a couple of substitutions, I can make a vegetarian version, too. Both the meaty and the veggie versions are delicious, filling and easy to make.

I love how versatile I can be with this recipe. For example, last night I didn’t have much time, so I ran to the store, bought pre-cooked chicken with the rest of my groceries, and threw the whole thing together when I got home. On more leisurely days, I’ll often buy chicken on sale, then cook and shred it myself. You could also use leftover rotisserie chicken. See how many options you have? I also had half a container of sour cream in the fridge, so I put that into the vegetarian version to give it a lovely tangy flavor.

As a base for the filling, I use cream of chicken soup and a little milk. On busy days, I use a can. Yes, I admit it. Sometimes the canned stuff is worth the time saved. If I have the time and energy, I make it myself with this super easy recipe from Mindfully Frugal Mom. Just leave out the mushrooms (or broccoli), and you have a lovely, easy cream of chicken in about 10 minutes.

If you like green chiles, like we do, they add a nice flavor to the enchilada filling without too much spice. My husband likes to roast these, himself, when we can get them fresh. But I love the convenience of the little cans of roasted green chiles. Plus, they’re just the right amount. If you don’t like green chiles, just leave them out!

As for the vegetarian version … spinach and mushrooms make a delicious combination. But this would work equally well with whatever vegetables you have on hand. Think zucchini, eggplant, kale, squash or anything else that will hold up in a tortilla. Broccoli and cauliflower would work, too. Just be creative, or use up the veggies in the fridge.

Okay, enough of the commentary. Here are the step by step instructions (with photos). The recipe follows at the end.


Chicken Enchilada Filling


First, shred up a bunch of chicken and put it in a large bowl.

shredded chicken

Shredded chicken for enchilada filling


Then add some cheese – I use a Mexican blend but plain cheddar works, too.

IMG_3120


Add the cream of chicken soup (either one can or about 1 cup of homemade) and a little milk to moisten the whole mixture.

IMG_3121 (1)


Throw in some chopped onions and green chiles and stir it all together.

IMG_3122 (1)

Your filling for the chicken enchiladas is done!


Vegetarian Enchilada Filling


If you’re making the vegetarian version, substitute chopped spinach and mushrooms for the chicken, and sour cream for the soup. Add salt, pepper and any other seasonings you like (I like garlic powder). Mix that all up!

Vegetarian Enchilada Filling

Veggie Enchilada Filling


Roll, Bake and Enjoy


Now it’s time to roll. Lightly grease a 9×13 baking dish (or use a little cooking spray). Then, spread some filling across the bottom half of a tortilla and roll it up. Place it in the baking dish, seam down. I usually use about 1/2 cup of chicken filling per enchilada and about 3/4 cup of the veggie mixture. The vegetables will shrink a little while baking, so roll those up tight!

I squeezed them in pretty tight last night and 10 enchiladas fit in the pan (half chicken and half veggie). If you want to give them a little more room (or make bigger enchiladas), 8 is a comfortable number for most families. Cover them with any extra filling – I do this so I can tell which ones are which. Then sprinkle more cheese over the top and put them in the oven.

chicken and veggie enchiladas

My pan of chicken enchiladas & veggie enchiladas going in the oven!


Bake them at 350 degrees for 20-30 minutes, until the cheese on top melts and the edges just start to get crispy. When they’re done, let them cool for about 5 minutes, then serve them up.

I like to serve them with beans (refried or black) heated up with a little cheese – just save some from the enchiladas. And if avocados are on sale, I’ll whip up some simple guacamole – just mashed up avocados, garlic powder and salt. Of course, these would be great with a simple salad or sautéed vegetables as well. Oh, and a little rice wouldn’t hurt either. Add your favorite salsa and you’ll be humming with yummies!

Whatever you serve them with, I hope you enjoy! And let me know what you think!


Print Recipe
Chicken Enchiladas
An easy and versatile recipe to get a wholesome, delicious meal on the table on even the busiest nights. These chicken enchiladas are quick to throw together and can be adapted to satisfy vegetarians with little effort - even in the same pan!
Chicken Enchiladas
Prep Time 15 minutes
Cook Time 30 minutes
Servings
people
Ingredients
For Vegetarian Filling
Prep Time 15 minutes
Cook Time 30 minutes
Servings
people
Ingredients
For Vegetarian Filling
Chicken Enchiladas
Instructions
  1. Preheat oven to 350 degrees and prepare a 9x13 baking dish by greasing or spraying lightly.
  2. In a large bowl, combine shredded chicken, 3/4 cup cheese, cream of chicken soup, milk, onion and green chiles. Mix well. * Use pre-cooked chicken or take 1 lb chicken, boil for 20 min. until cooked through. Cool then shred. Can be done in advance.
  3. Place approximately 1/2 cup of the filling across the bottom of a tortilla and roll securely. Place in baking dish, seam side down. Repeat until pan is full. Don't worry if there's a little leftover filling.
  4. Spread remaining filling over the top of the rolled enchiladas in the pan.
  5. Sprinkle remaining cheese evenly over the top. (Reserve a handful of cheese to warm in your beans if desired.)
  6. Bake for 20-30 minutes or until cheese on top is melted and edges begin to brown.
  7. Remove from oven & let rest for 5 minutes.
  8. Serve and enjoy!
For Vegetarian Enchiladas
  1. Substitute spinach & mushrooms for the chicken.
  2. Substitute sour cream, salt & pepper for the cream of chicken soup. Add any additional seasonings as desired (garlic, herbs, etc.).
  3. Mix and roll and bake as for Chicken Enchiladas, but use a little more filling since the vegetables will shrink while cooking.
Recipe Notes

Ingredients as listed will make a full pan of enchiladas - either chicken or vegetarian. If you would like to combine both versions into one pan, just use half the chicken and half the vegetables. Split the rest of the ingredients into two bowls, prepare as usual and bake them together. Spreading the leftover filling on top will help you identify which ones contain chicken and which ones contain the veggie version.

Share this Recipe
Read More