
Volcano Eggs: Easter Eggs Meet Simple Science
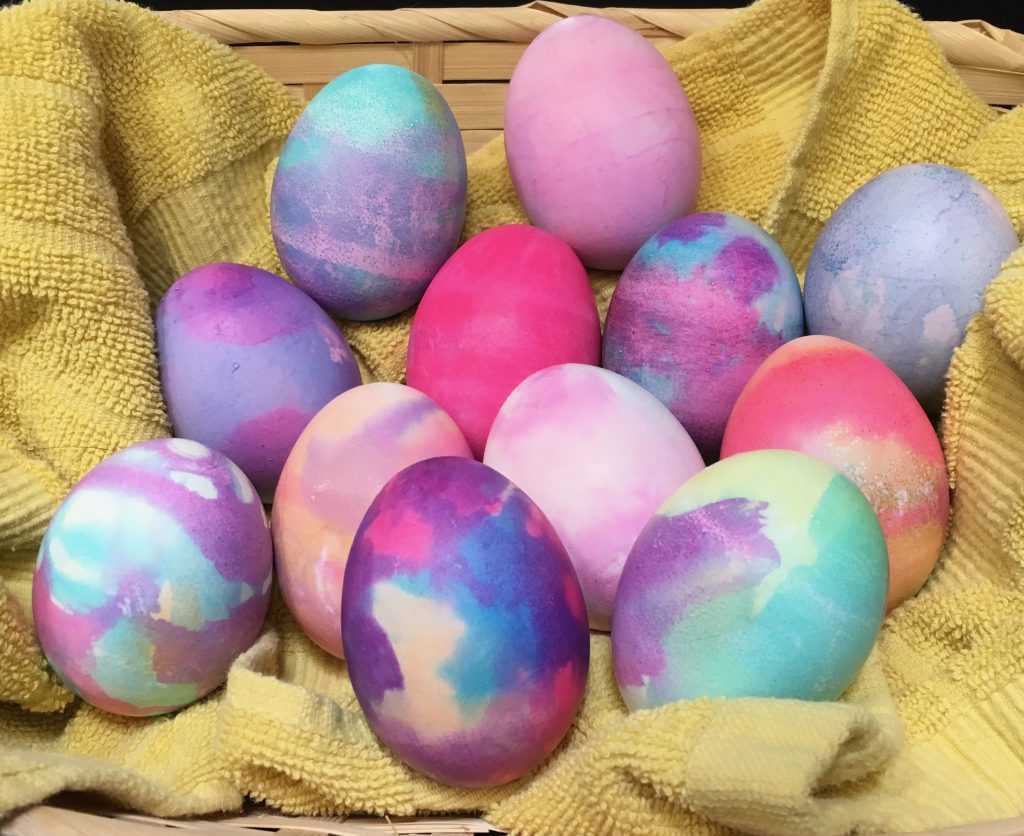
Colorful Volcano Easter Eggs
Easter Egg Dyeing: Quick and Easy
Easter is tomorrow! If, like me, you waited until the last minute to color your eggs, this method of dyeing Easter eggs will make your eggs beautiful in a simple and easy way. (Be sure to keep reading until the end for a bonus method of dyeing eggs quickly, and they look fantastic!)
First, boil your eggs. Countless experts have weighed in on how to do this so your eggs are easy to peel, and your yolks don’t turn grey. My electric-stove method is simple: put your eggs in a pot, cover with cold water and bring to a gentle, rolling boil. Boil for 5 minutes, then turn the heat off, cover, and leave the pot on the burner for 7 more minutes. After 7 minutes, immediately remove the eggs and place them in an ice bath (just a big bowl of ice water) to stop the cooking. Allow the eggs to cool, and you should have beautiful boiled eggs.
Once they cool, pat them dry and they’ll be all set to get some color on!
Volcano Eggs: How to Do It
I first saw this method of dyeing Easter eggs on Facebook with a link to Toddler Approved. Her eggs turned out vibrant and beautiful, but when I used this method, mine did not. Not to be deterred, I started over. I found another tutorial on Playdough to Plato, and this worked better for me. The colors turned out brighter, and the overall volcano effect was more dramatic. So this was the method for us.
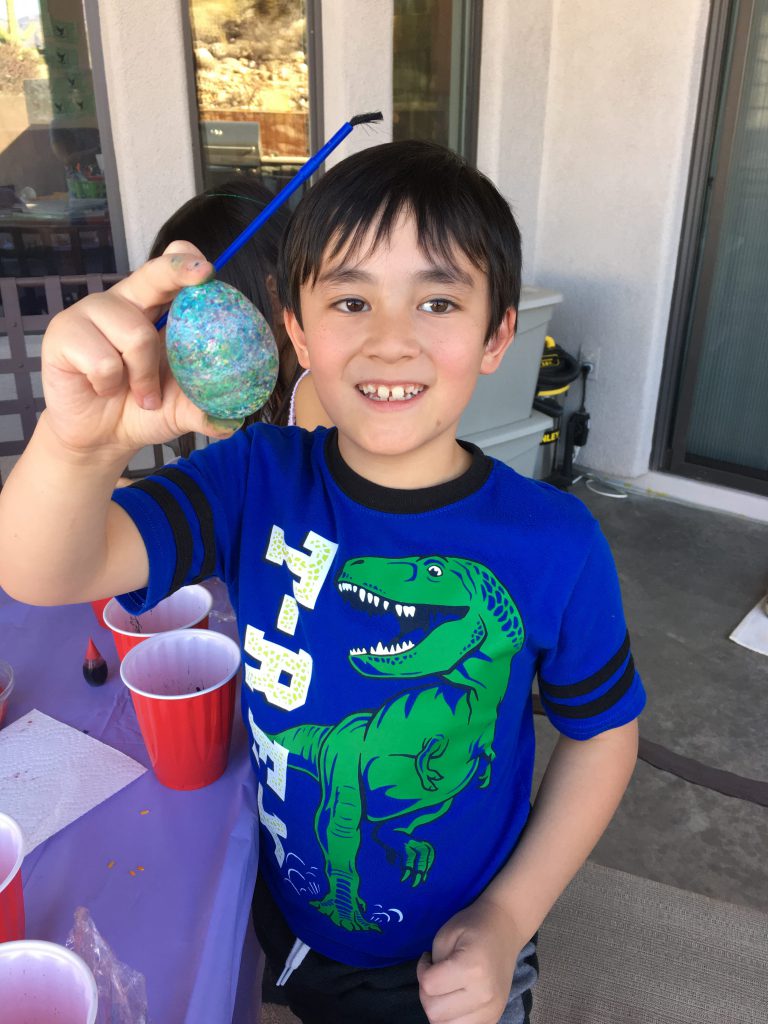
Since this creates a dynamic scientific reaction, my son and I made a video to capture the fun. Written instructions follow immediately below the video.
Here’s what you need:
- Baking soda
- Food coloring – I had liquid and gel colors and both worked beautifully
- An ice cube tray or other small containers to mix your colors in
- Water
- White vinegar
- Paint brushes
- A large, shallow dish or pan with sides (I used a pie pan, but anything with sides will work)
- A clear, wide-mouth glass or jar (needs to be wide enough to fit an egg)
- A variety of items to mix with and add small amounts of water – small spoons, toothpicks, eye-dropper or whatever you have
- An empty egg carton to dry your eggs in (save the one the eggs came in)
How to do it:
- First, mix your “paints” – put about a tablespoon of baking soda in your ice cube tray, add a few drops of food coloring, then start with a small amount of water and start mixing. It should be grainy at first. Add water a couple drops at a time until you have a spreadable paste. Repeat with your other colors.
- Prepare your volcano – pour vinegar into a clear glass or jar, enough to cover your egg when dropped in. Place this into your shallow pan and set aside.
- Paint your eggs with your paste paints. Feel free to mix colors and slather on the paste as thick as you want.
- Once you finish your design, gently drop the egg into the glass of vinegar and watch the volcano erupt!
- Remove your egg from the vinegar, allowing most of the vinegar to run off. Then put your finished Easter egg in the drying carton.
- Repeat with more eggs until you’re done.
A few observations:
- The more paint you use, the more dramatic your volcano eruption will be.
- Allowing the paste to sit on the egg for a while will intensify your colors.
- Adding more food coloring to your paste will also help intensify your colors.
- Your colors and designs you paint on your egg may come out different after being dunked in the vinegar. That’s part of the fun! Just roll with it; it’ll be okay.
- You can re-use the vinegar. It will start to look muddy and murky, but it will still work. Feel free to change it to fresh vinegar if you want to see everything as it happens, but don’t feel like you have to change it with every egg. That will use a lot of vinegar and is not necessary for the chemical reaction to occur.
- You don’t have to wash the eggs after you finish. The vinegar will simply evaporate as it dries. But if you want to make the vinegar smell go away faster, feel free to give the eggs a quick rinse in clean water.
That’s it! A simple, fun and educational way to color your Easter eggs that will have your kids wanting to make volcanos every weekend.
While this did make pretty Easter eggs, the process made quite a mess of my fingers and took a bit of effort set up. It was definitely fun, though I’d rather avoid having a lot to clean up when all is said and done. My son loved it, but it tended to lose its excitement after the first few eggs. I would do it again, but would add some other techniques to keep it fun and to mix up the designs a bit.
My Other Favorite Method for Quick, Easy and Beautiful Easter Eggs
Gorgeous Easter Egg done with rice and food coloring
If Volcano Eggs don’t float your boat, try the rice method for dyeing your eggs. It super quick and easy, and it makes unique and stunning designs.
Here’s what you need:
- Large plastic drinking cups
- Uncooked rice
- Food coloring
- Plastic wrap
How to do it:
- Put about 1/4 cup of uncooked rice into a cup
- Add several drops of food coloring and swirl it around to coat the rice. Repeat with other colors.
- Place a boiled egg into a cup, cover the top with plastic wrap & secure plastic with a rubber band.
- Now put some music on and shake! No really, just shake the egg around. No music required, but it does make it fun.
- You can stop right there, or you can keep shaking your egg in different cups to add layers of color.
- Keep going until you have gorgeous Easter eggs, and you’re done!
I hope you’ll give these Easter egg dyeing techniques a try, and I hope you have a wonderful Easter! As always, thanks for visiting and let me know what you think of these!
Read More